
If you’ve been looking for the perfect treat for a baby shower, birthday parties, or just any special event, look no further! We’re diving into how to make chocolate covered Oreos with mold. Yes, with the magic of a silicone mold, you’ll be able to craft the most beautiful chocolate covered treats that look professionally done, right in the comfort of your own kitchen.
A Little Bit of Background: how to make chocolate covered oreos with mold
Before we jump into the nitty-gritty, let me share a personal tidbit. I remember the first time I tried making chocolate-covered Oreos. I didn’t have the right equipment, and let’s just say the results were… well, not blog-worthy. But once I discovered the power of the Oreo mold, it truly took my baking to the next level. This is the easiest way to get those perfect chocolate edges, a smooth finish, and a great dessert that’s sure to impress.
Chocolate covered oreos
Ingredients:
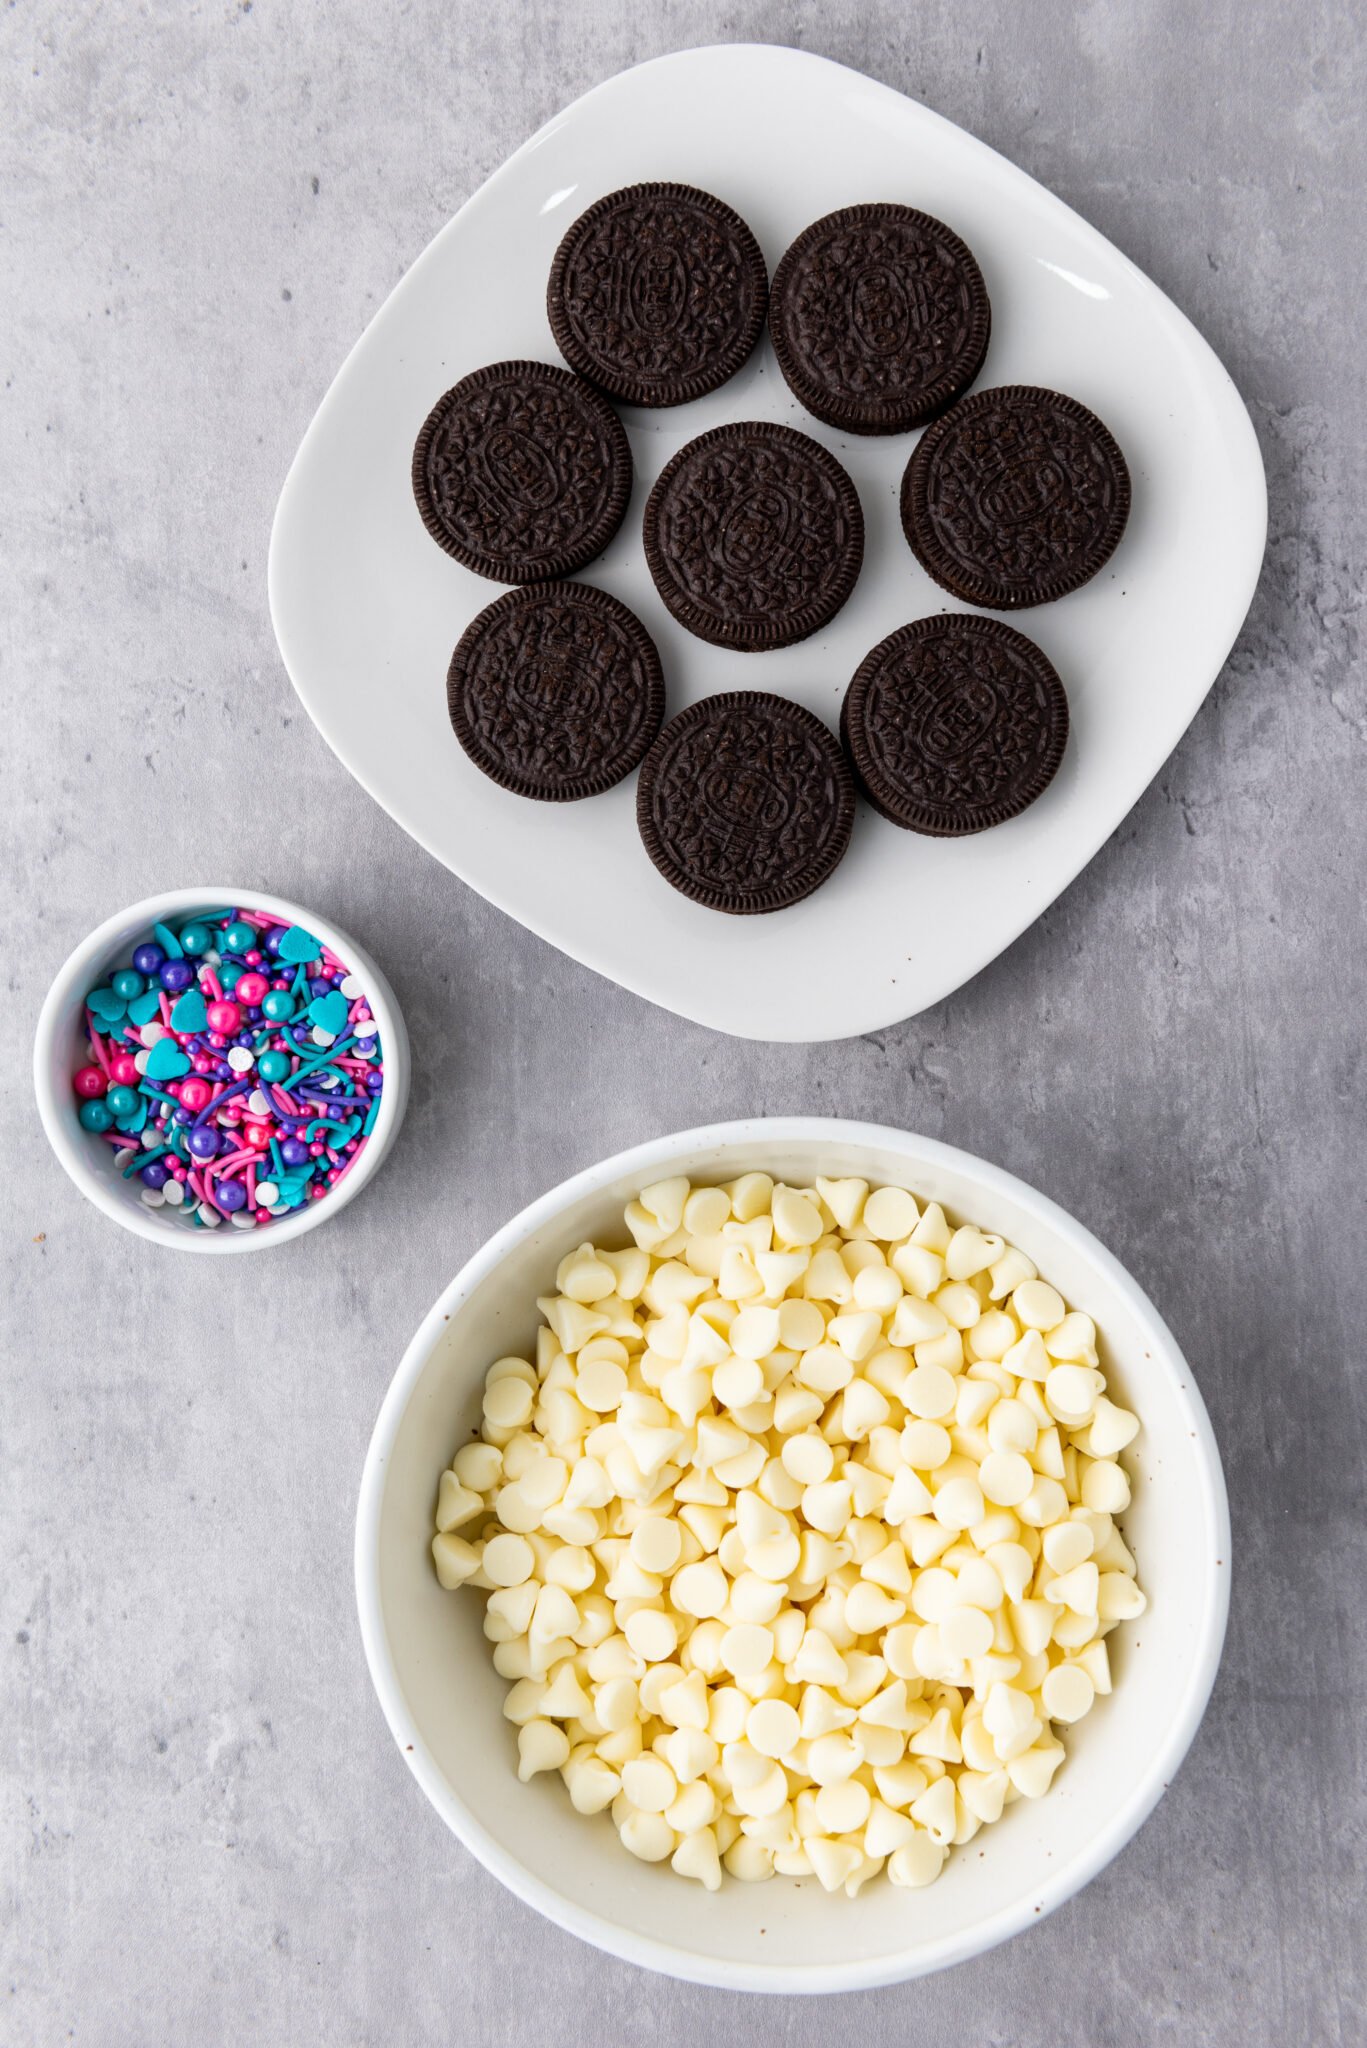
- 8 Oreo cookies
- 8 oz White chocolate chips
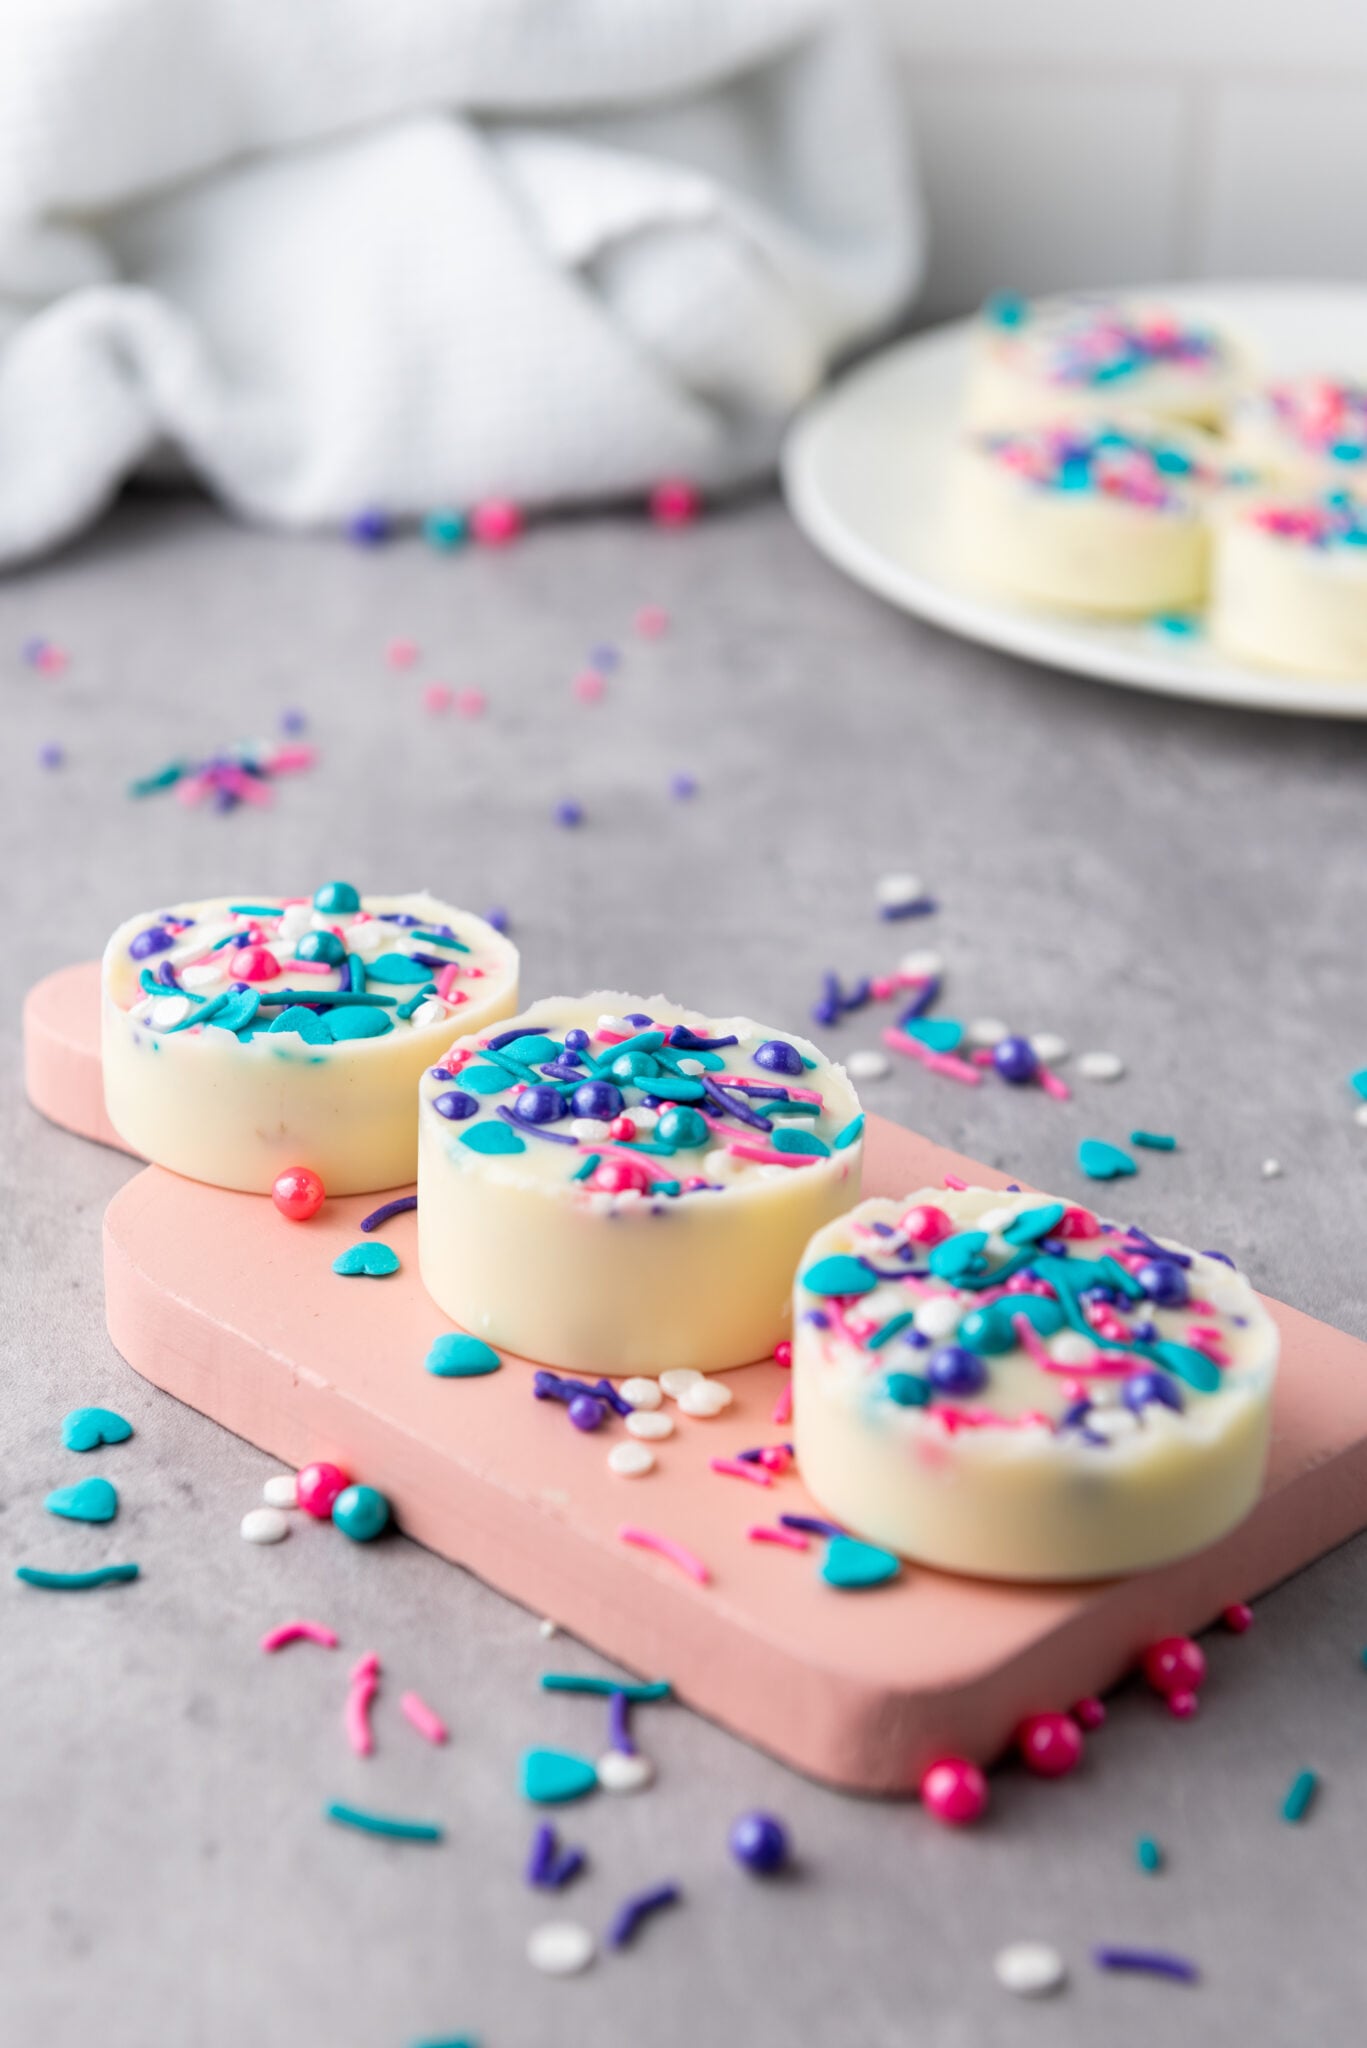
- 2 tbsp sprinkles, of your choice.
- OREO Mold: Get It HERE

How to make chocolate covered oreos with mold:
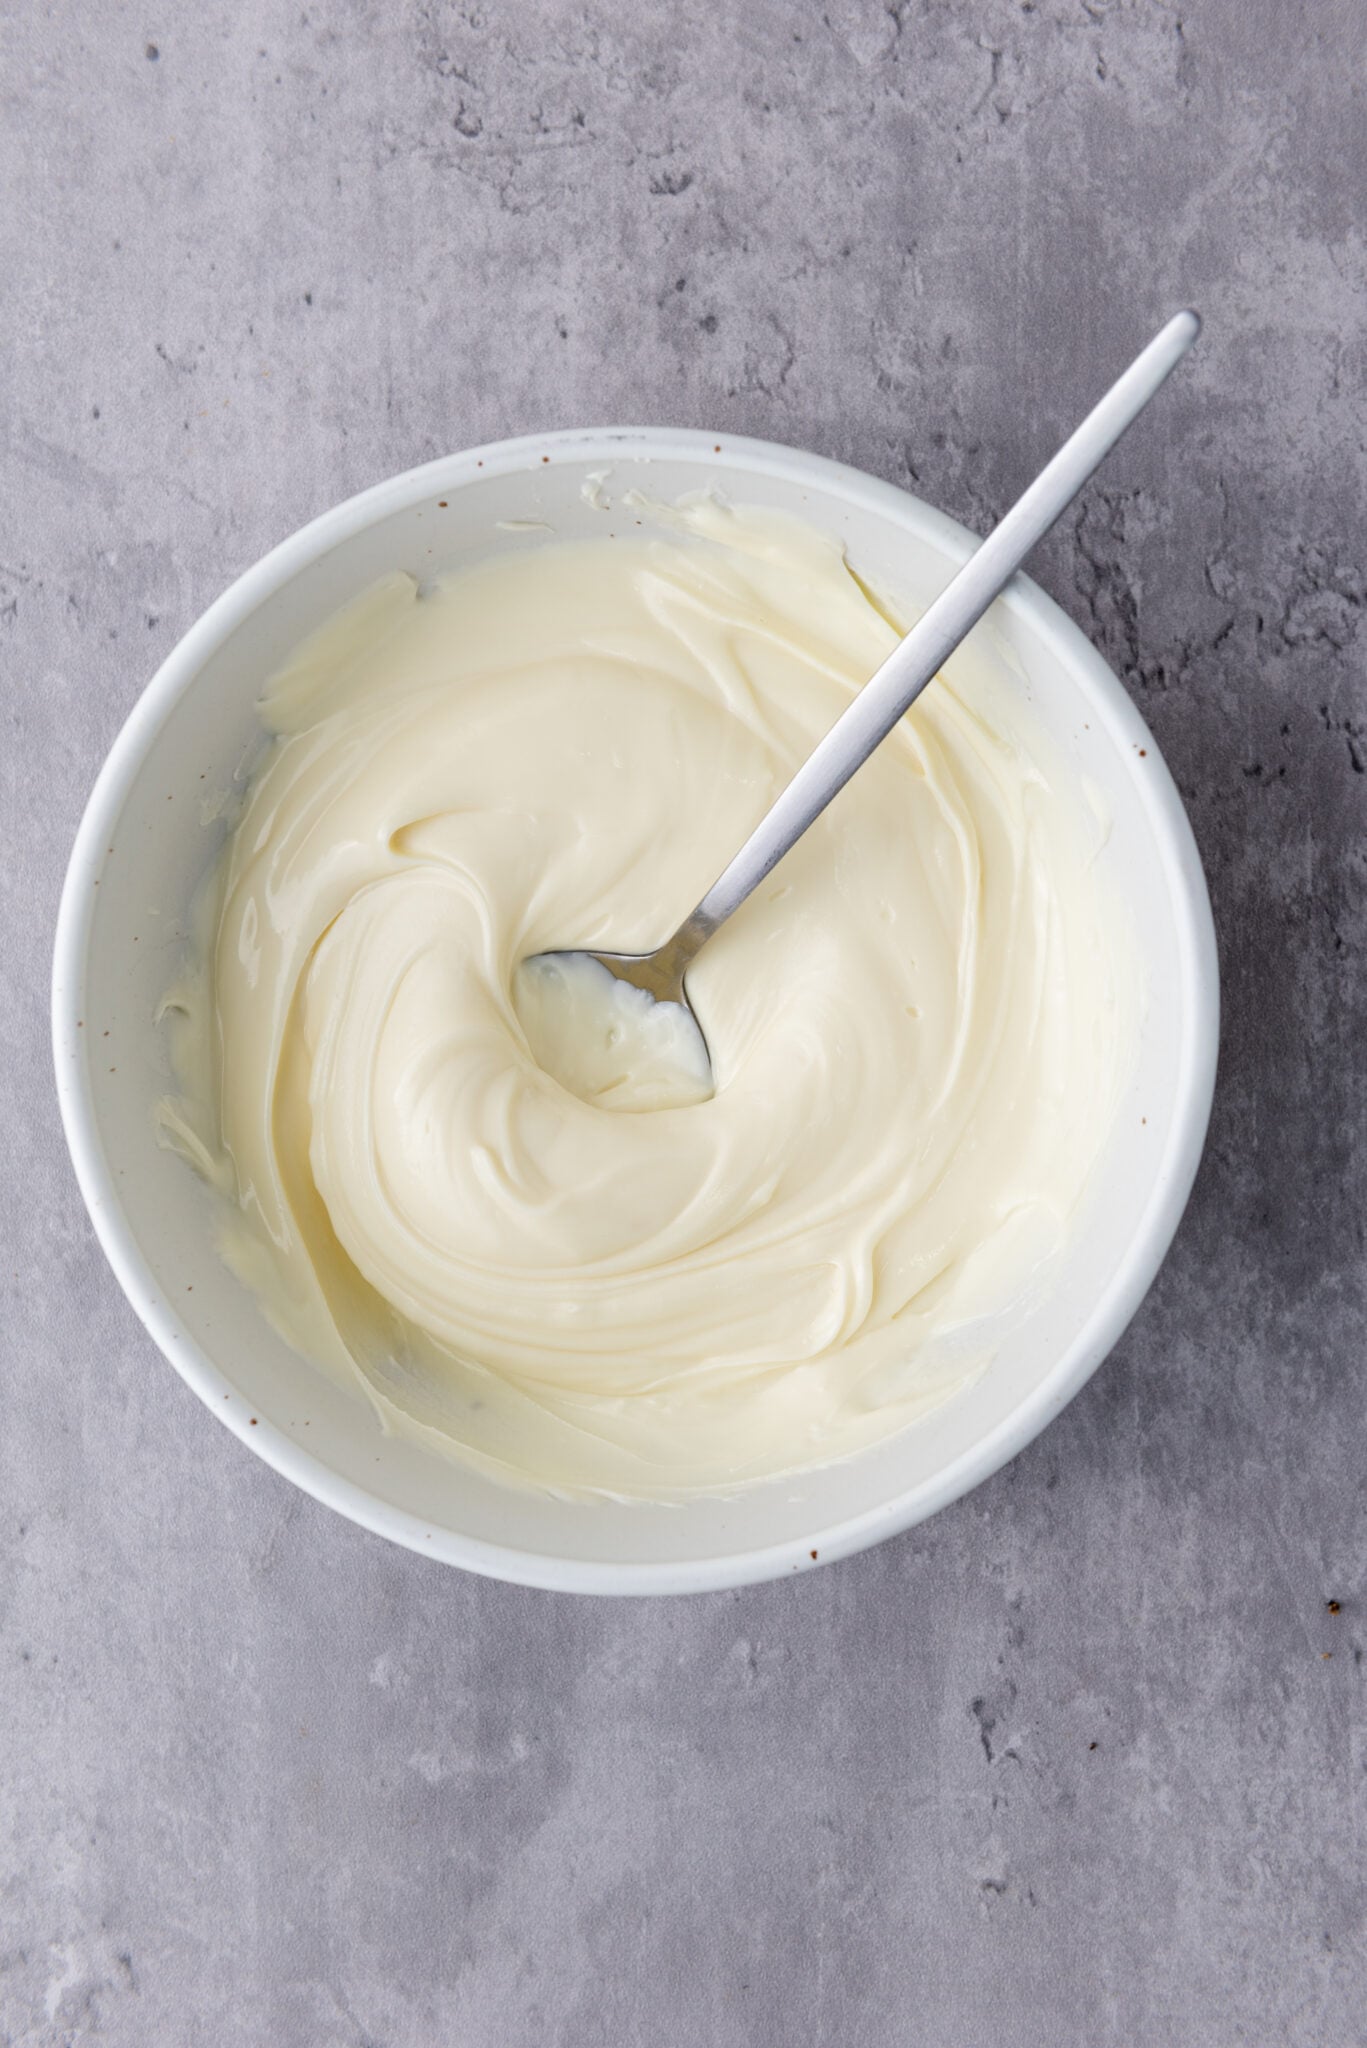
Melting the Chocolate: In a microwave-safe bowl, melt the white chocolate chips in increments of 30 seconds, for about 2 minutes or until it’s perfectly smooth. Ensure to stir the chocolate at each interval to prevent any burns. And trust me, using high-quality chocolate makes a difference!

Prepping the Mold: Scoop a spoonful of the melted white chocolate into each cavity of the Oreo mold. Make sure the bottom is generously covered with a thin layer of melted chocolate.
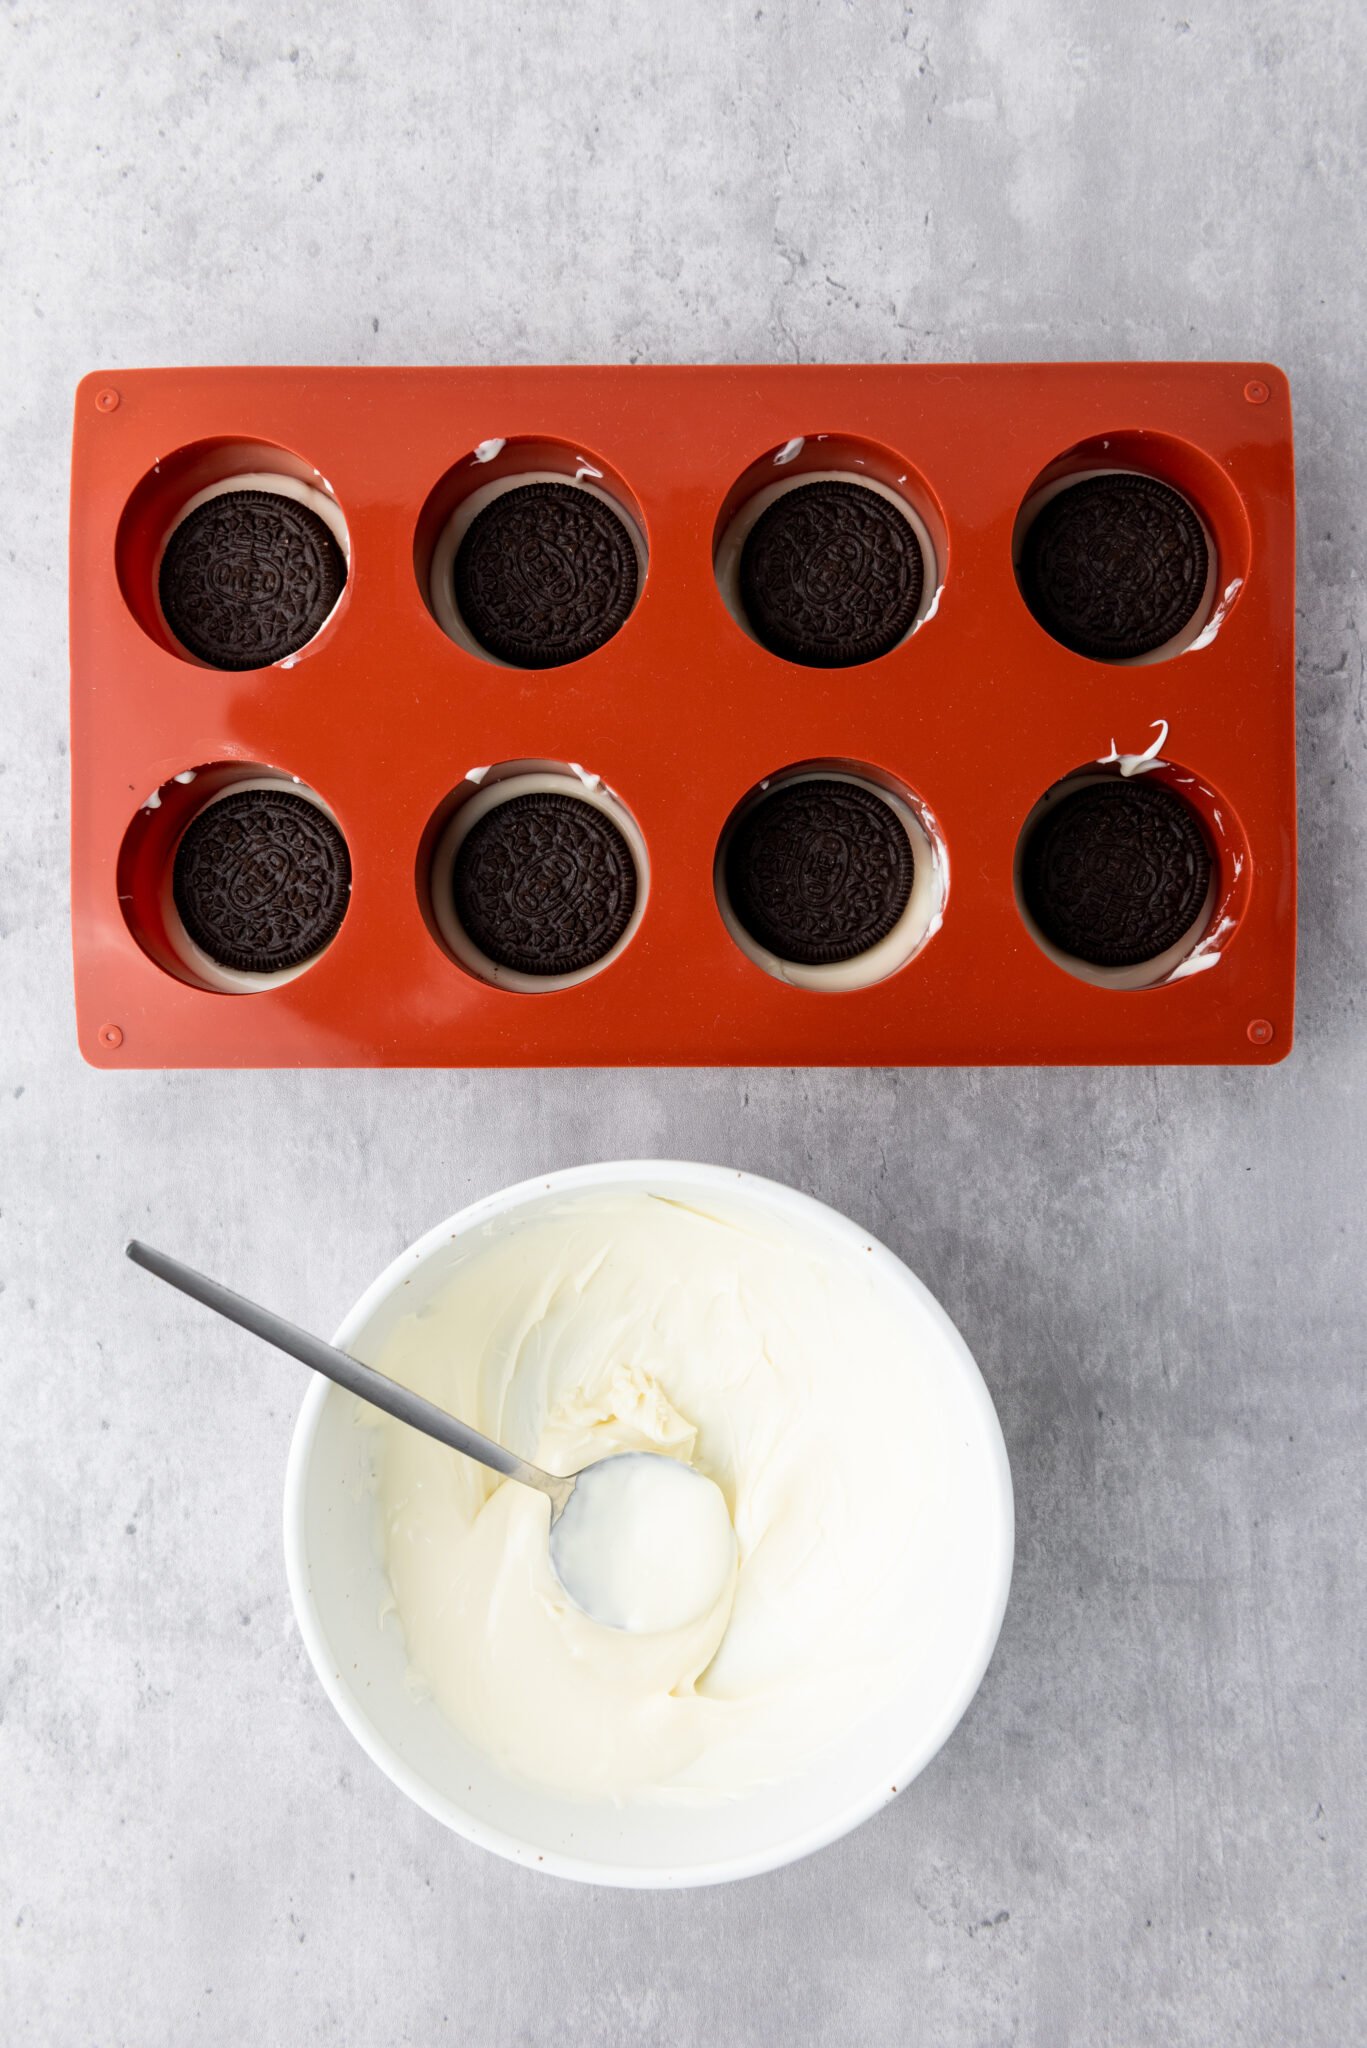
Oreo Time: Place an Oreo cookie into each mold cavity, giving it a gentle push to ensure it’s snuggly in place.
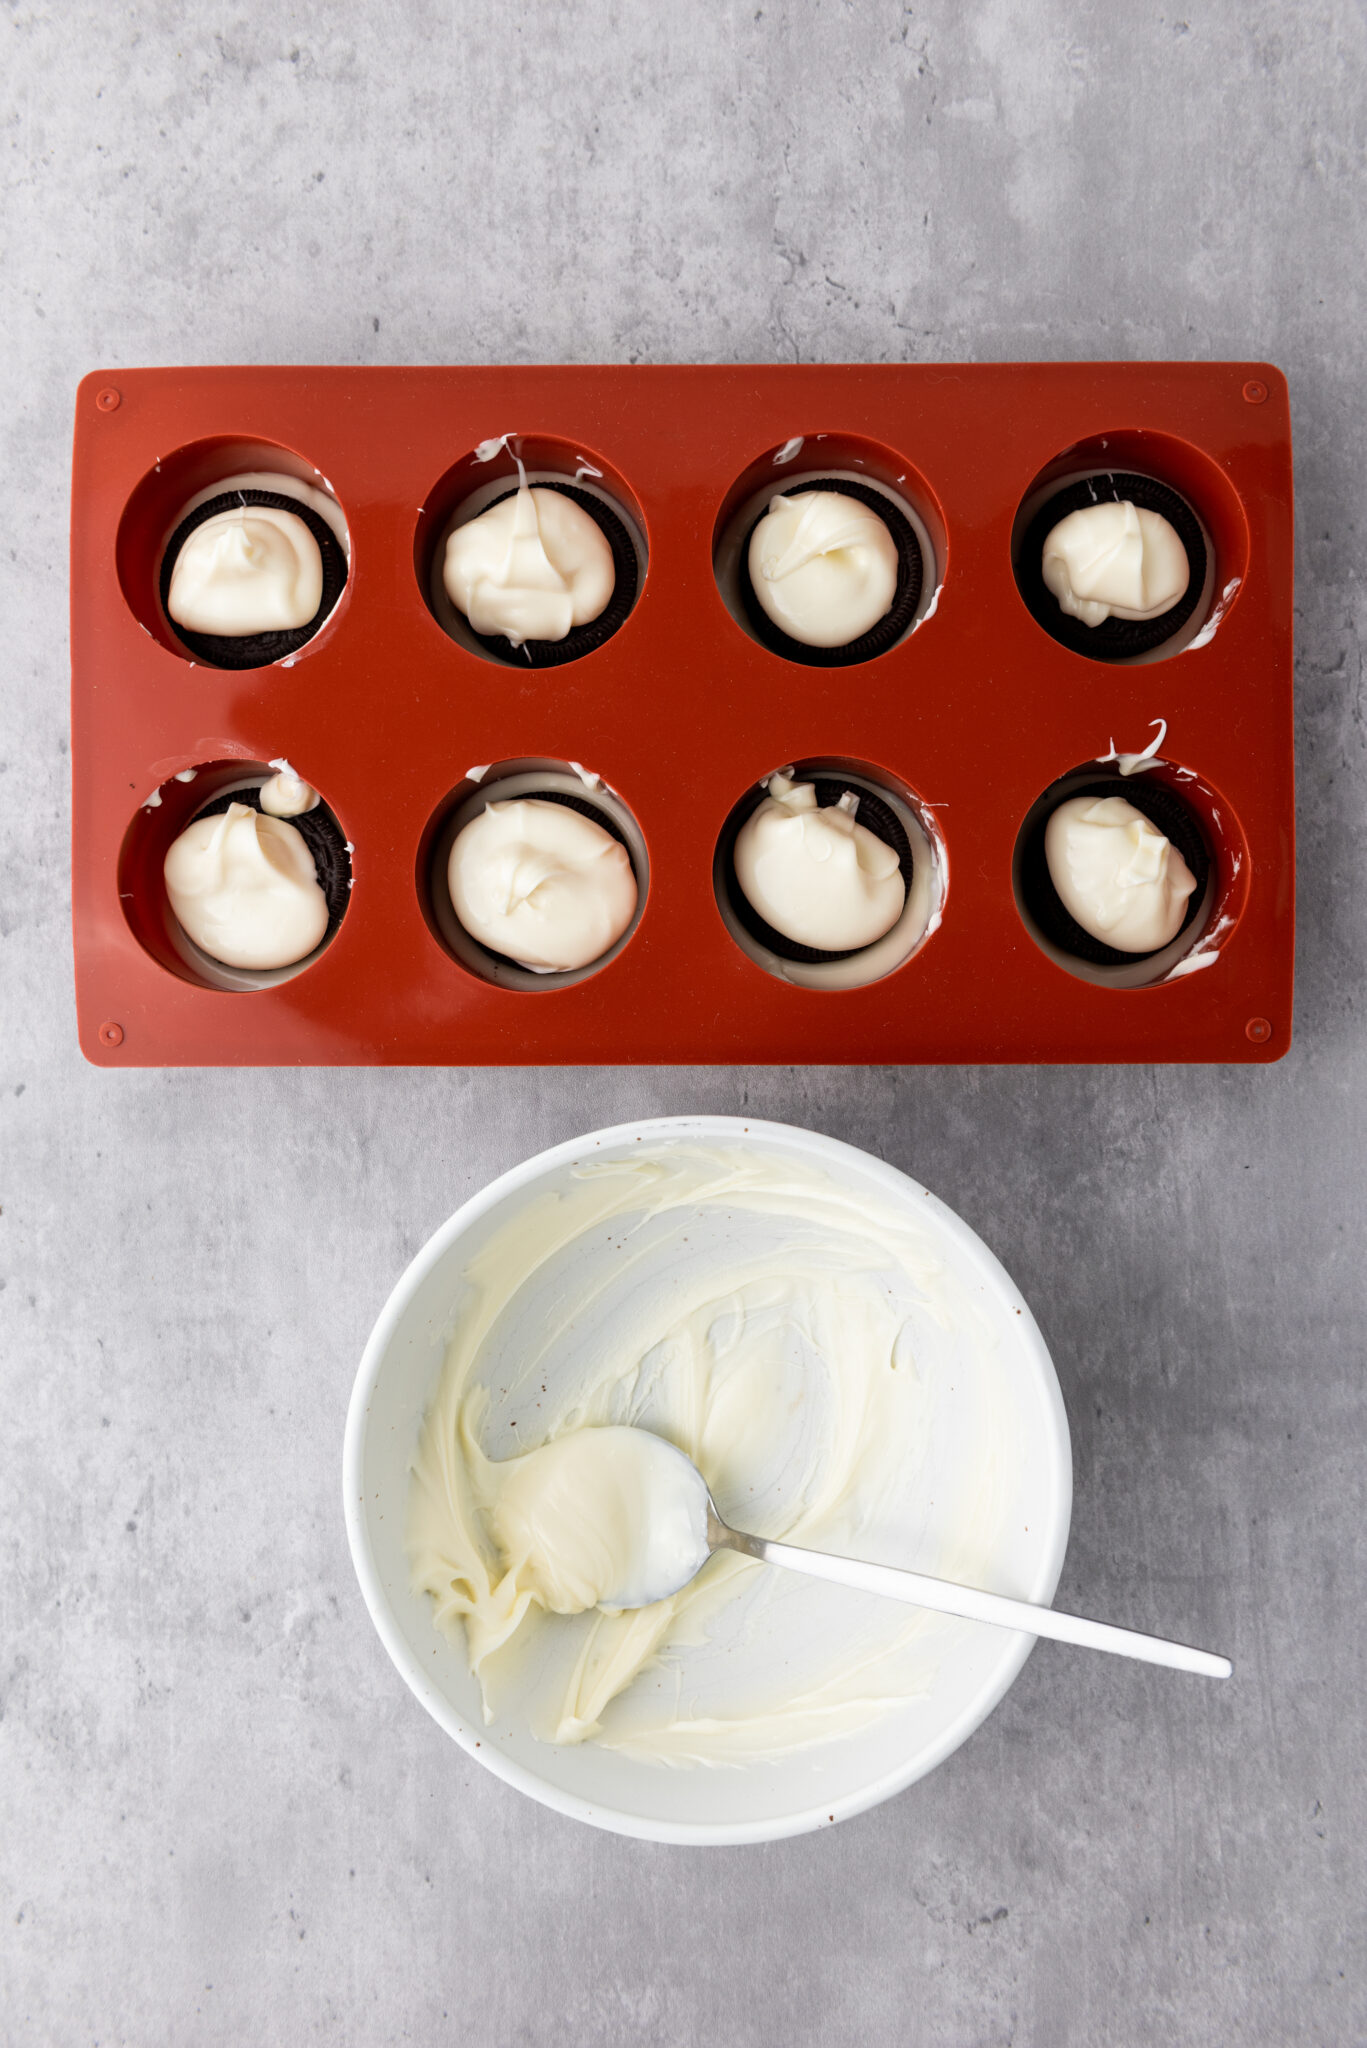
More Chocolate: Pour another scoop of the warm chocolate on top of the Oreos. A tip here – shake the mold a little bit to ensure the chocolate covers the Oreos evenly, giving it that professional touch.
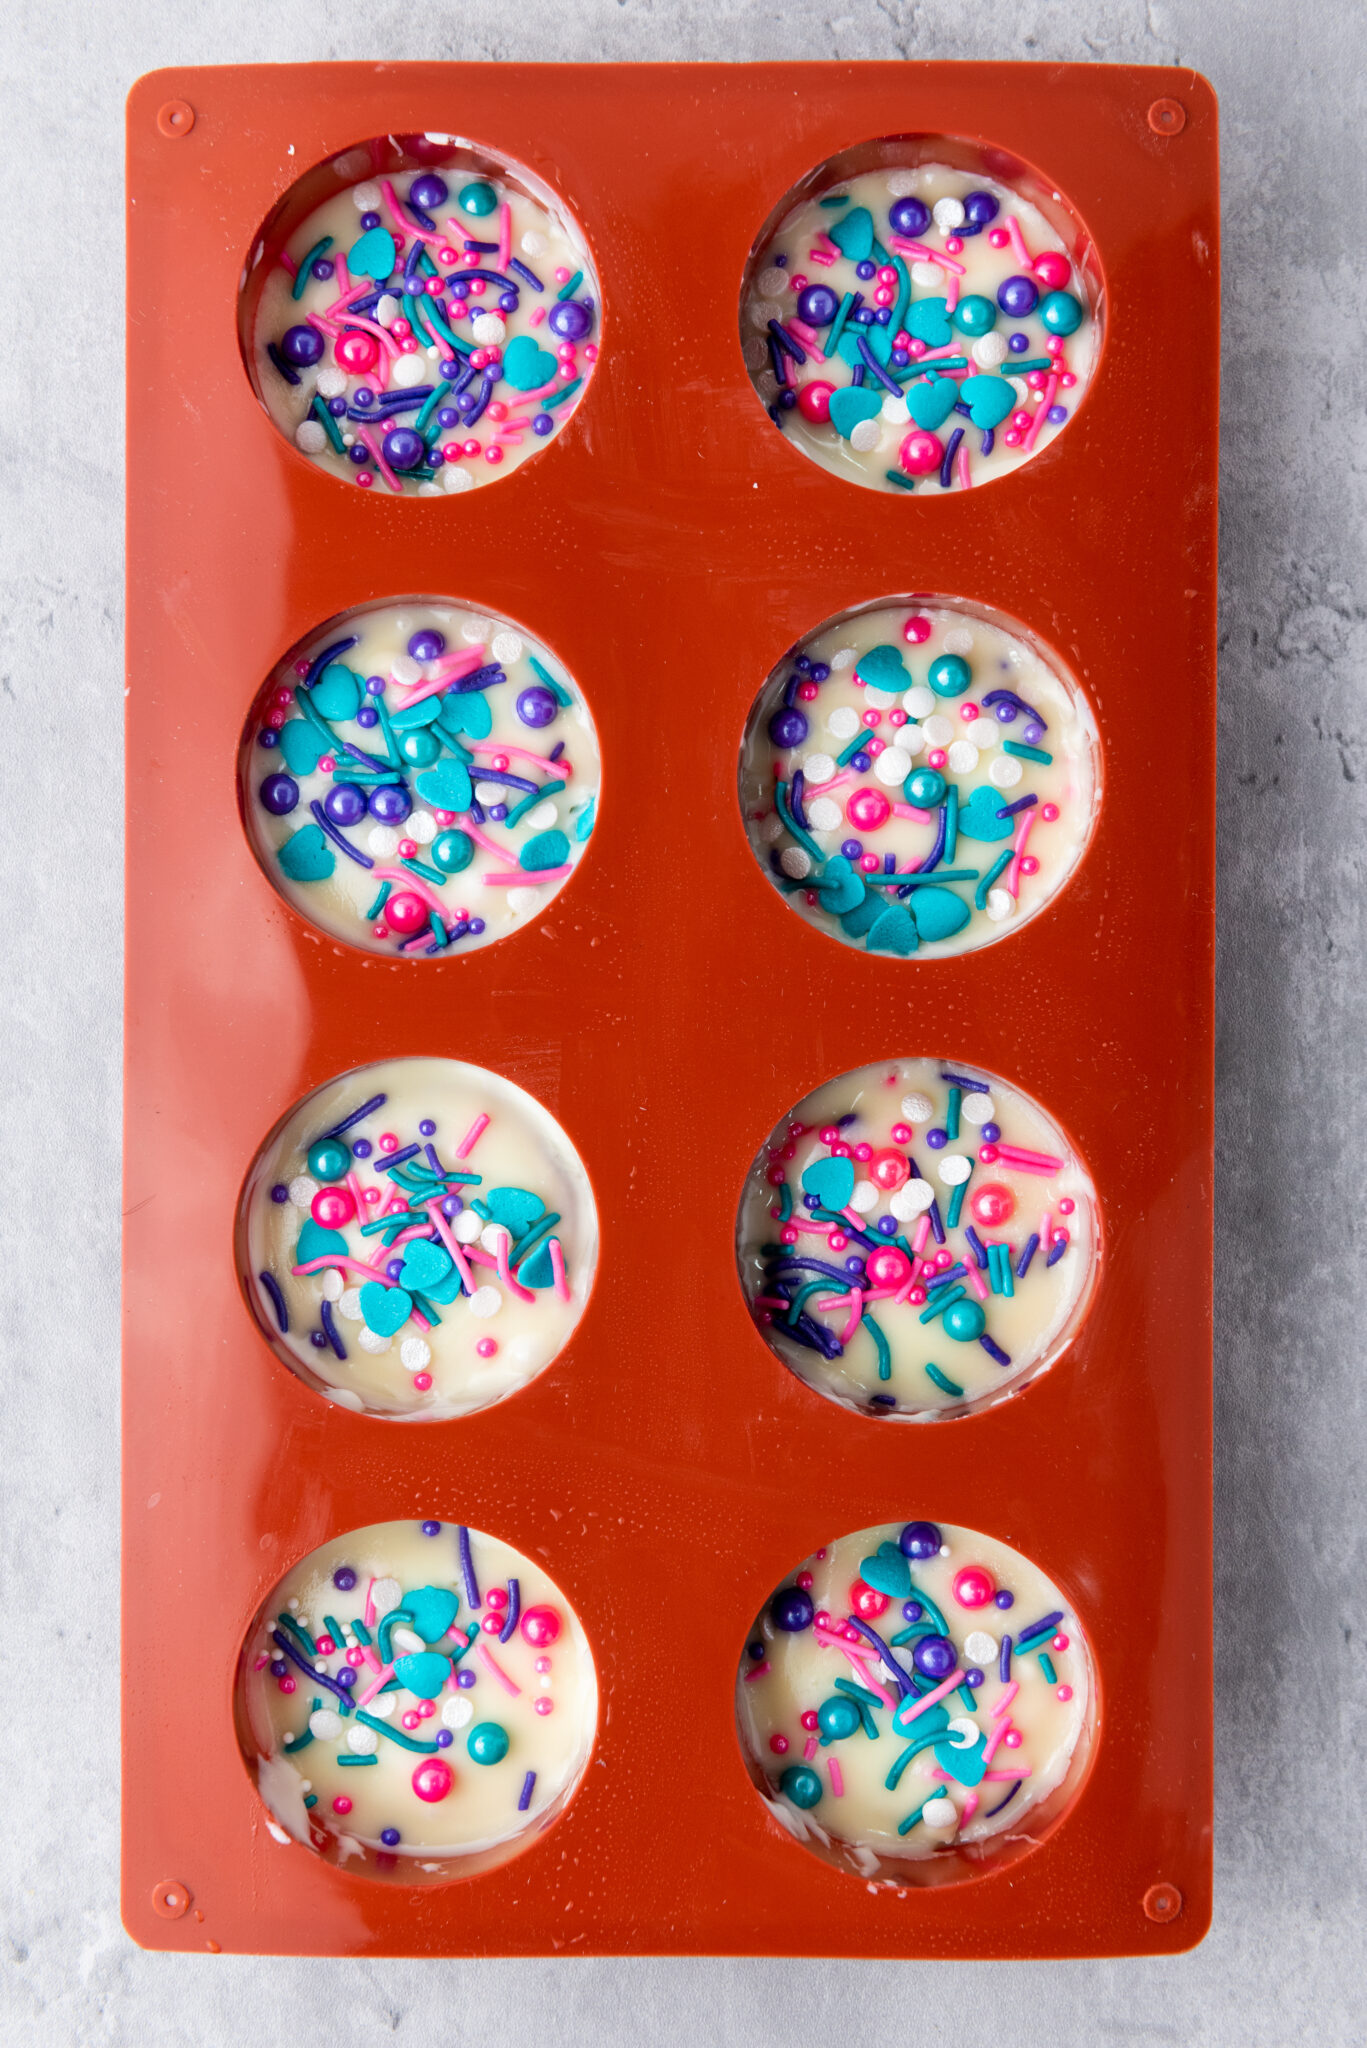
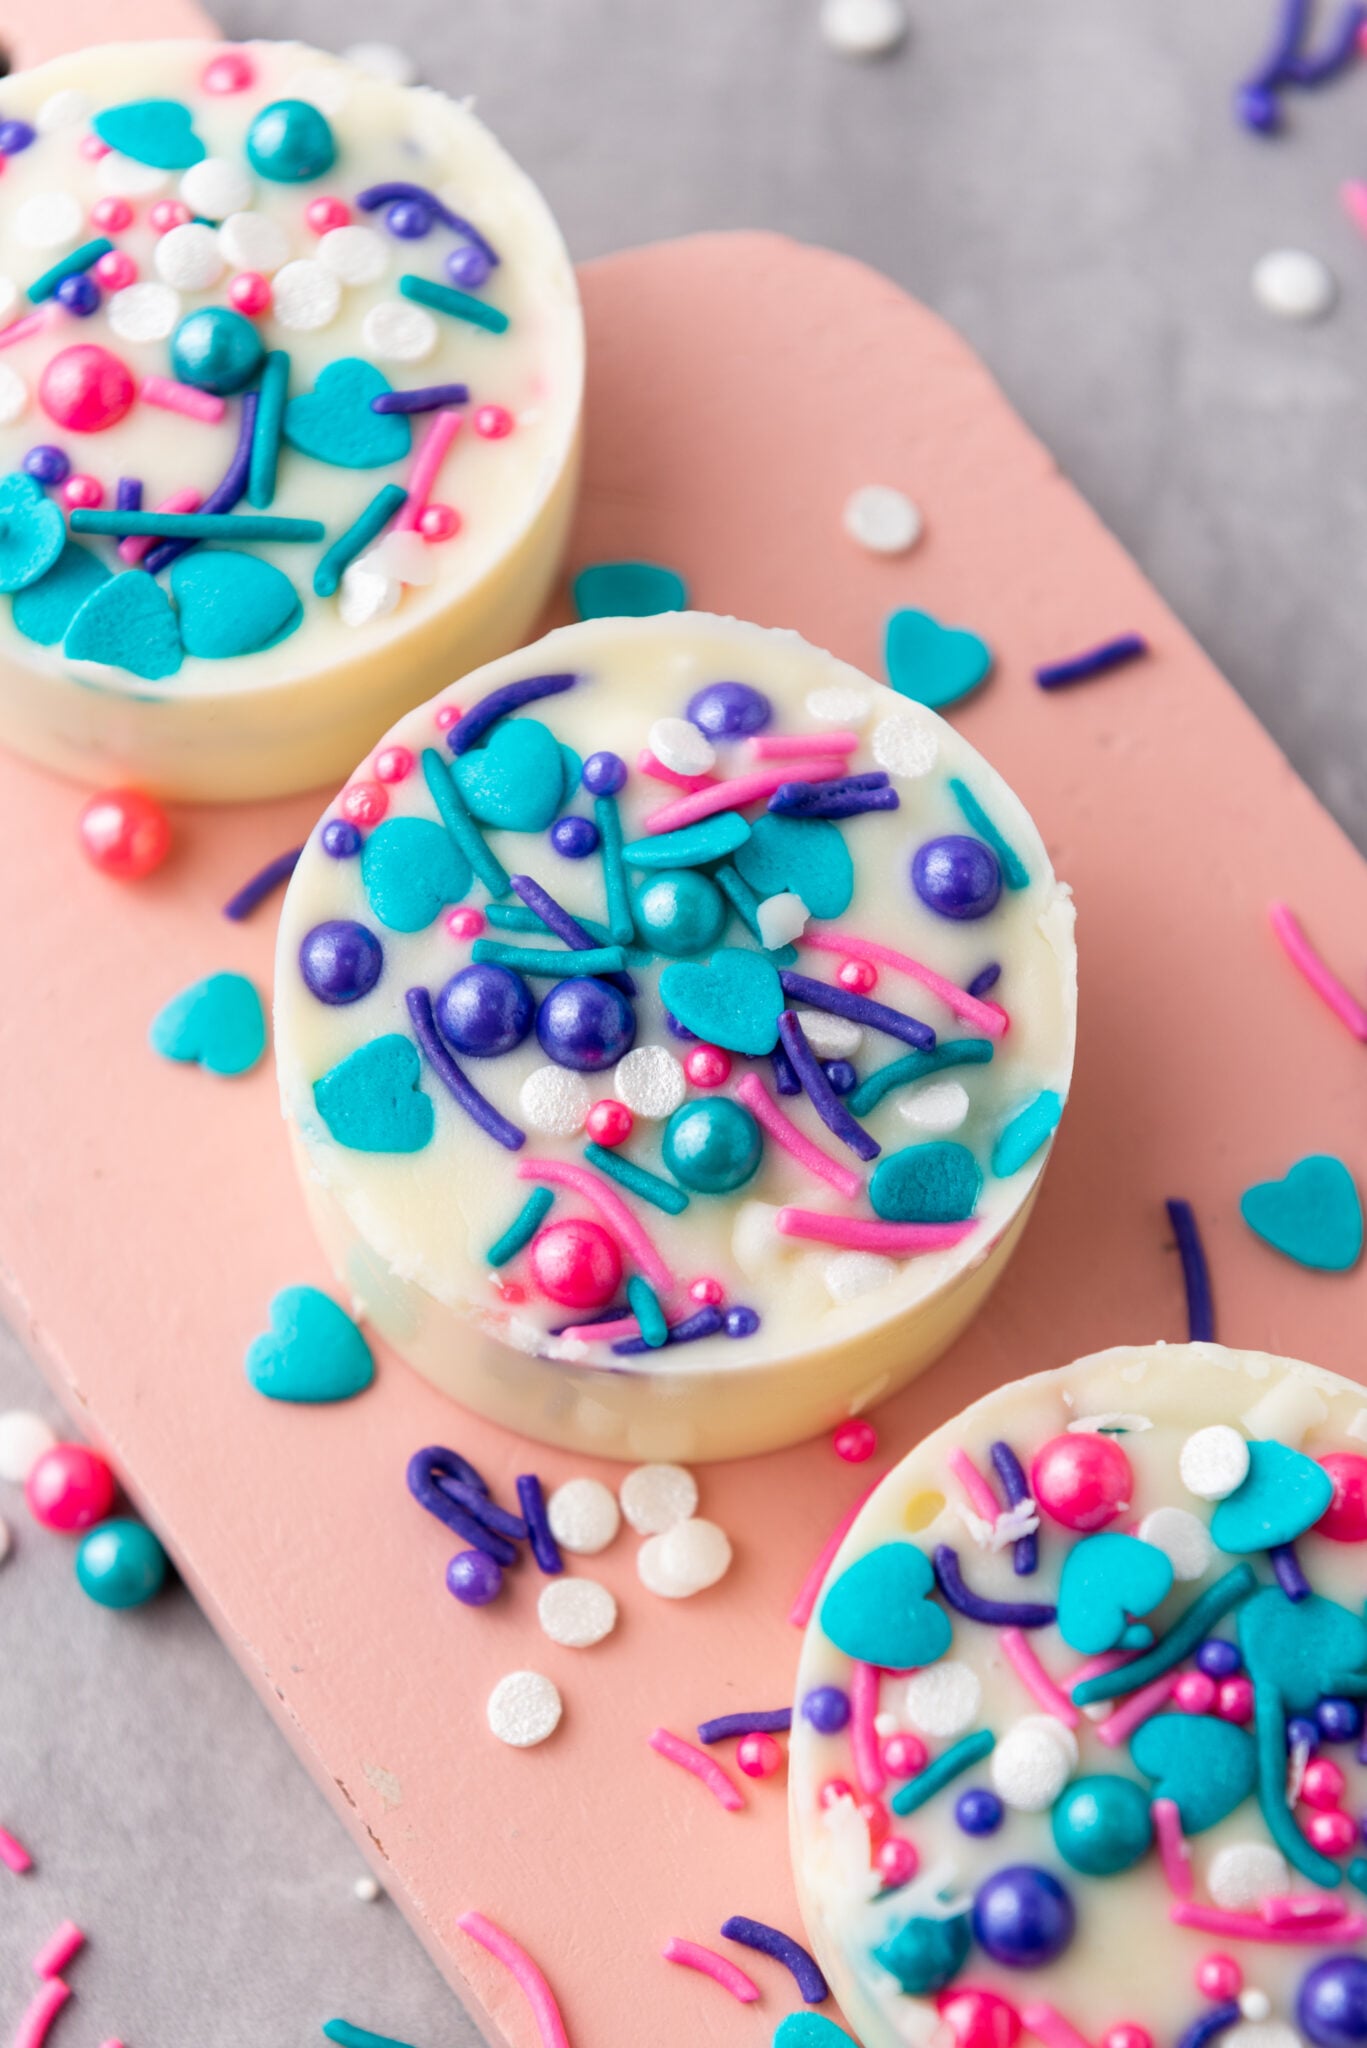
Sprinkle Away: While the chocolate is still warm, sprinkle your colorful sprinkles on top of the chocolate. You can also experiment with food coloring or even chocolate transfer sheets for a unique look.
Cooling Time: Place the Oreo mold in the fridge for at least 30 minutes, ensuring the chocolate sets to perfection.
Tips for the Best Results:
- Room Temperature Oreos: Always ensure your Oreo cookies are at room temperature. This helps in ensuring the chocolate sets evenly.
- Avoiding Air Bubbles: After pouring the melted chocolate, tap the mold gently on the countertop. This helps in releasing any trapped air bubbles for a smooth finish.
- Storing: Once set, store these delicious treats in an airtight container to maintain their freshness.
- Chocolate Choices: While I’ve used white chocolate chips here, feel free to experiment with milk chocolate, dark chocolate, or even almond bark. The choice of chocolate, of course, can vary based on your personal favorite.
Frequently Asked Questions:
1. Can I use different molds for this recipe?
Absolutely! There are different molds available, from the specific Oreo cookie mold to more generic silicone molds. Craft stores or even grocery stores often carry a variety. It’s all about your personal preference and the occasion.
2. How long can I store these chocolate-covered Oreos?
In an airtight container, these can last for 2-3 weeks. But honestly, they’re usually gobbled up long before that in my home!
3. What if I don’t have a microwave?
No worries! You can melt the chocolate using a double boiler. Simply place a glass bowl over a pot of simmering water, ensuring the bottom doesn’t touch the water, and melt your chocolate there.
4. Can I add other toppings apart from sprinkles?
Of course! Cocoa butter, candy wafers, or even piping some additional chocolate on top can be much fun and take your Oreos to the next level.
5. Can I use chocolate candy melts instead of regular chocolate?
Yes, chocolate candy melts are also a great option and they come in various colors. Just remember, real chocolate often gives a richer taste.
Key Takeaways:
Molds Make a Difference:
Using an Oreo mold, especially one made of silicone, can drastically change the end result of your chocolate-covered Oreos. Here’s why:
- Perfect Shape Every Time: The mold cavities are designed to fit Oreo cookies snugly, ensuring each treat comes out uniform and professionally crafted.
- Silicone Advantages: Silicone molds are flexible, making it much easier to pop out your chocolate-covered Oreos once they’re set. No more struggling with rigid molds or ending up with broken chocolates!
- Easy Cleaning: Silicone molds are typically dishwasher safe and non-stick, making the cleanup process a breeze.
Quality Matters:
The type of chocolate you choose can make or break this recipe. Here are some pointers on this:
- Taste Difference: High-quality chocolate melts more smoothly, is less likely to seize, and offers a richer flavor compared to cheaper alternatives.
- Melting Consistency: Quality chocolates have a consistent melting point, ensuring your chocolate-covered Oreos have that luscious, velvety texture.
Experiment:
The world of chocolate-covered Oreos is vast, and there’s so much room for creativity!
- Chocolate Varieties: Try using milk chocolate, dark chocolate, white chocolate, or even flavored chocolate melts. Each offers a different taste experience.
- Toppings Galore: Beyond colorful sprinkles, consider toppings like crushed nuts, sea salt, caramel drizzles, or even dried fruit bits.
- Artistic Touch: Use chocolate transfer sheets or food coloring to create patterns and designs on your Oreos, making them as much a visual treat as they are a tasty one.
Storage:
Storing your treats correctly is crucial to maintaining their taste and texture.
- Keeping Freshness: An airtight container keeps out moisture and prevents the chocolate from developing a white, powdery appearance, known as ‘bloom’.
- Room Temperature vs. Fridge: While the fridge is great for setting the chocolate initially, storing your treats at room temperature in a cool, dry place is usually best for taste and texture.
- Stacking Up: If you’re stacking them, placing parchment paper between layers can prevent the Oreos from sticking to one another.
Enjoy the Process:
Making these chocolate-covered delights is more than just following a recipe; it’s about enjoying the journey!
- Bonding Time: This is a great recipe to involve kids or loved ones. Assign tasks, and make it a team effort.
- Creativity Outlet: From choosing toppings to deciding on chocolate types, let your creativity shine.
- Rewarding Results: At the end, not only do you get a delicious treat, but you also get the satisfaction of having crafted something beautiful with your own hands. There’s a special joy in seeing people’s eyes light up when they bite into an Oreo you’ve artfully decorated.
In Conclusion: How to make chocolate covered oreos with mold
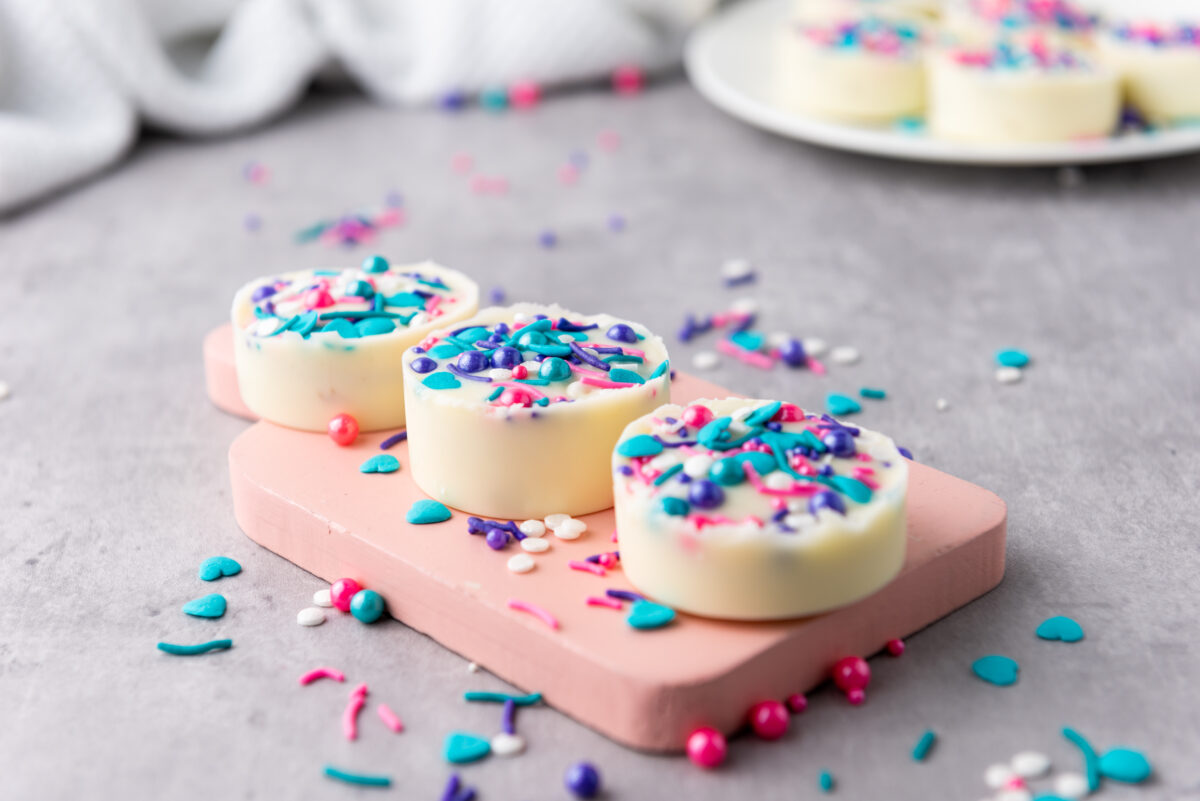
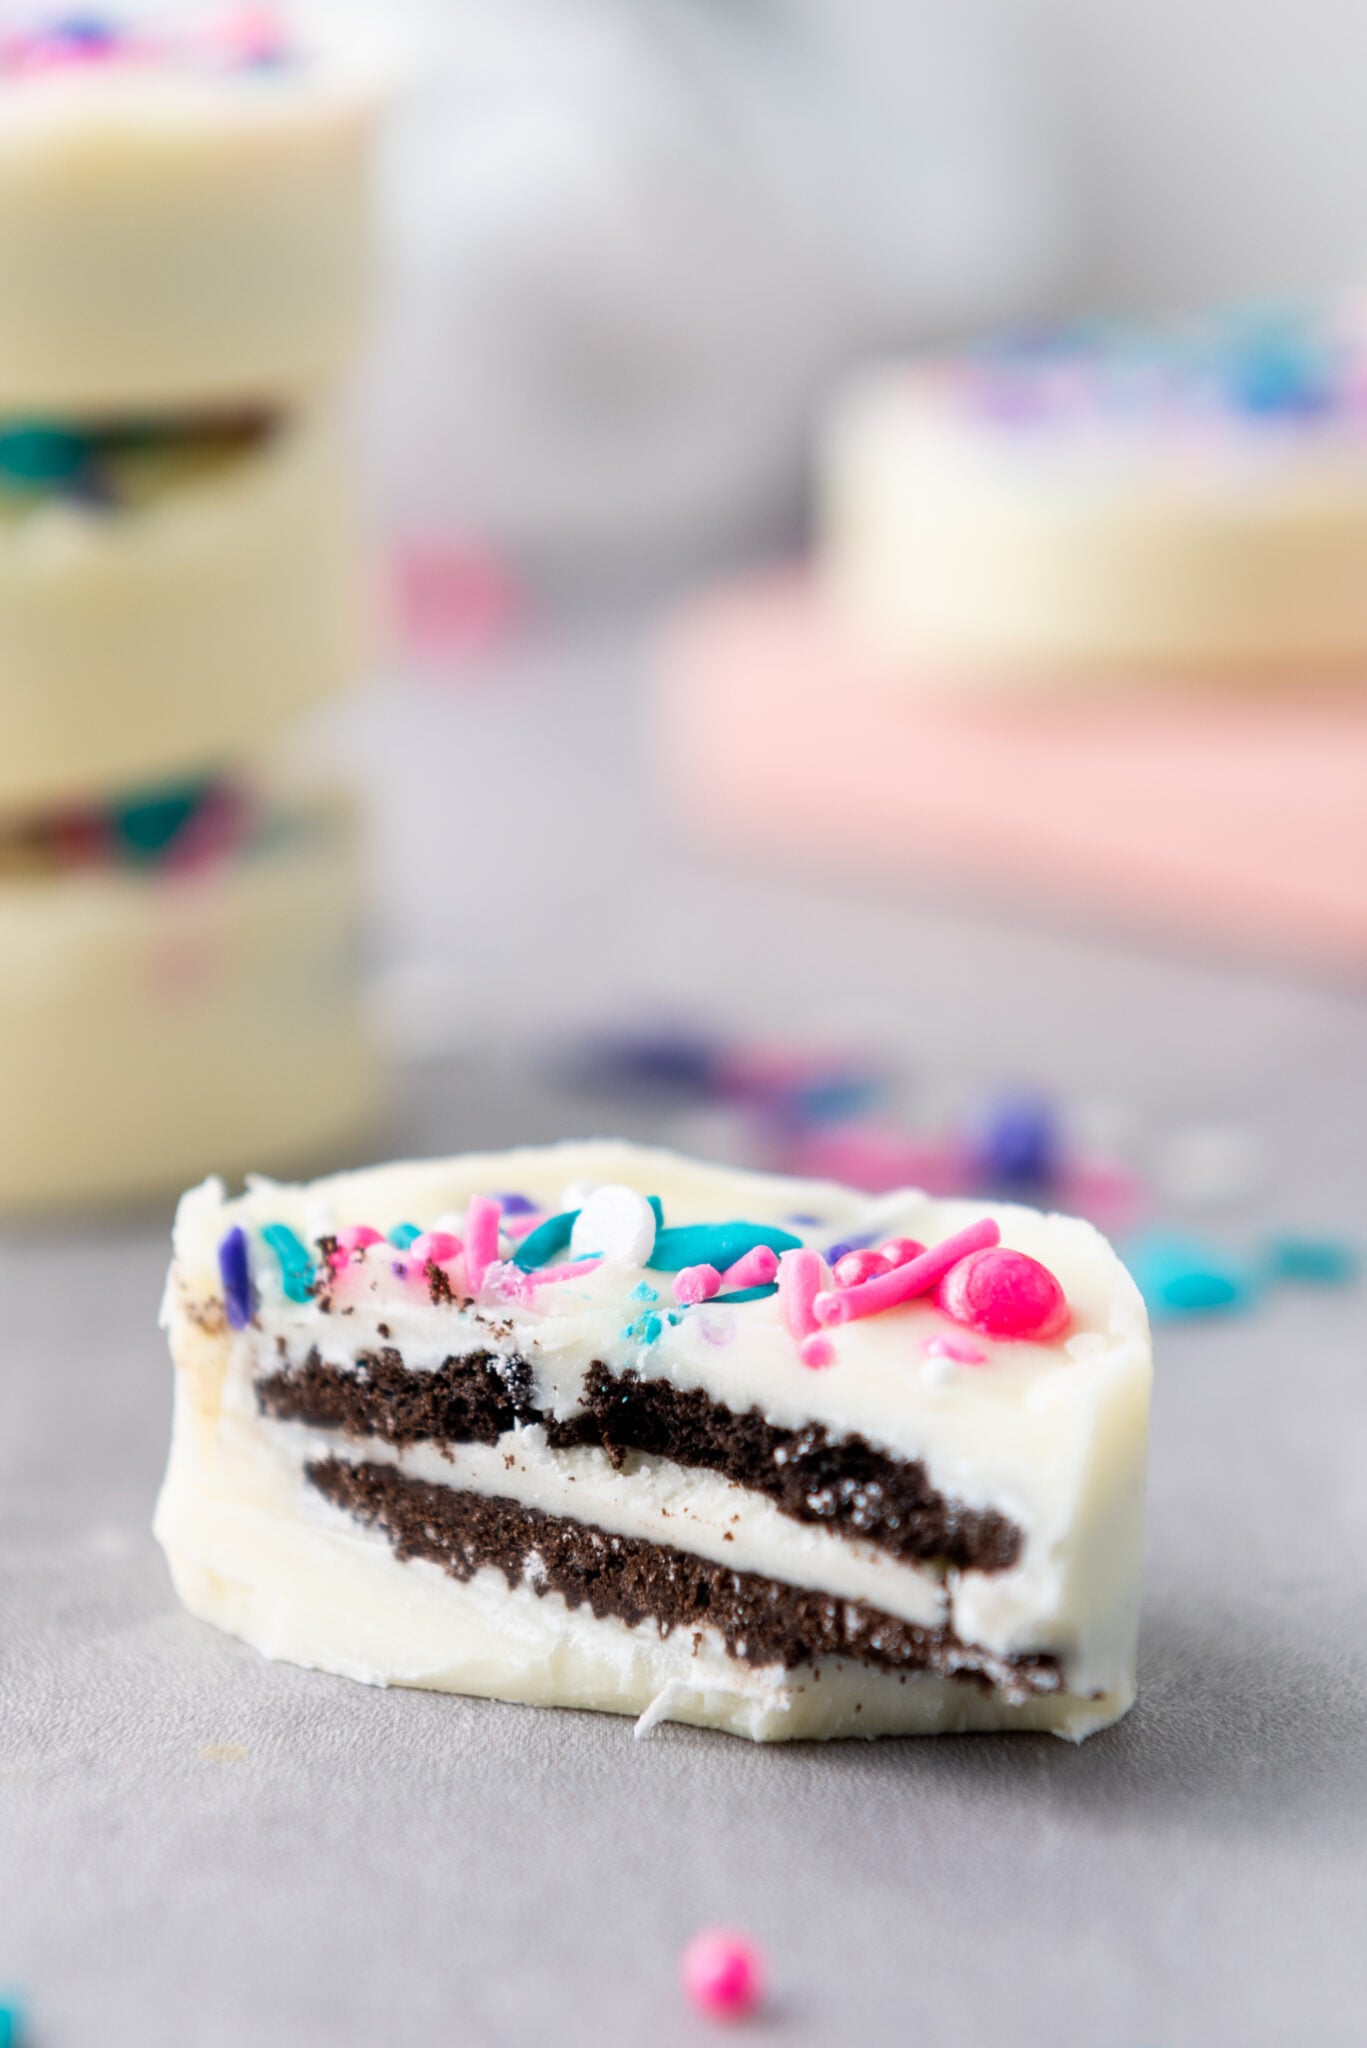
There you have it! A simple recipe to create the most delightful chocolate-covered Oreos using a mold. Whether it’s Valentine’s Day, a bridal shower, or just a no-bake dessert evening with the family, this is sure to be a hit. The combination of the crunchy Oreo with the silky chocolate is just irresistible.
I hope you found this guide helpful and are now ready to take on this delightful baking adventure. And remember, sometimes the best treats come from simple ingredients and a little bit of love. Until next time, happy baking!
Chocolate covered Oreos

Ever wondered how to create those picture-perfect, drool-worthy chocolate-covered Oreos you see in gourmet stores? With the magic of a simple silicone mold, I'm sharing the secrets right from my kitchen! Dive into my latest blog post and bring the art of chocolatey delights right to your home. Perfect for parties, special occasions, or...you know, Tuesday treats
Ingredients
- 8 Oreos
- 8 oz White chocolate chips
- 2 tbsp sprinkles, of your choice.
Instructions
- Melt the chocolate in the microwave in increments of 30 seconds, for about 2 minutes, or until fully melted. Make sure to stir them chips each time.
- Scoop a spoonful of melted chocolate into the Oreo mold, so that the bottom is covered with chocolate.
- Place an Oreo on top of the chocolate, and slightly push down.
- Place another scoop of melted chocolate on top of the Oreos and shake the mold until all chocolate is covering the Oreos evenly.
- Top with your favorite sprinkles
- Put in the fridge for at least a half hour, until solid.

Hi, my name is Melissa! I live in Spanish Fork, Utah. I’m happily married to Rob, and together we have five wonderful kids. Our family loves to embark on adventures, often in our RV, exploring the great outdoors. I’m an avid reader and a big fan of Hallmark movies – they always have a way of lifting my spirits. Hiking is another passion of mine; there’s nothing like the tranquility of nature. I have a sweet tooth for chocolate and a love for Mexican food, both of which make life a little more delicious. In my downtime, I enjoy playing games with my family, creating memories and sharing laughter. Life is an adventure, and I’m here to enjoy every moment of it! I’m the blogger and creative mind behind the blog A Sparkle of Genius! Check out our posts on recipes, crafts, kid stuff, printables, travel and more!